Remediation – down the rabbit hole
Do you remember the post Environmental Assessment Meets Alice in Wonderland where I took you on a journey down the rabbit hole of environmental assessments. Where we discovered we had asbestos containing material in our house and some mould issues. Well today I ask you to continue with me down the rabbit hole into the world of asbestos and mould remediation.
We have decided to hire a professional to do the asbestos and mould remediation in areas of the house where we are doing renovations. This post is not for the faint at heart as there are definitely moments of shock, horror, tears and mad laughter. Everyone grab their tea cup and sit back and relax. I think I hear the Mad Hatter laughing? Do you?
This post may seem late or out of sequence to the other posts. But this is for good reason. You see we unfortunately landed in a legal battle with the seller of the property and therefore could not write anything about the state of the house as it pertained to the lawsuit. As you read on, it will become clear why we went down this path. And sadly, it has become another learning that I really did not want to learn. I think perhaps I have or will learn every possible reno mishap on this property. However, think how much smarter I will be in the long run! I will capture the legal battle in another post, so you can learn from our experience, and hopefully help prevent you from having to go down the same path. But first let’s continue the house story…
Asbestos and Mould Remediation Process
Our journey begins with getting a quote for the remediation of the asbestos and mould. The plan is to have all the drywall removed from walls and ceiling in the basement and the drywall on some of the walls in the kitchen. Seems simple enough. Until you see the quote. As previously mentioned if you disturb asbestos or mould it must be managed appropriately and disposed of properly. However until this moment I did not truly understand what this entailed.
How to describe to you… Well let’s visualize a hospital that has been put in quarantine due to an infectious outbreak. Everything is cordoned off in plastic sheets, with the infected individuals inside. The only way you can get inside… you must wear full protective gear that looks like you just stepped out of an alien movie. When you depart, you go through special decontamination areas where you shower and change to ensure the infection is contained. We have all seen this in movies, right? Well now visualize our house as the infected person in the hospital and the house is now in a contamination bubble. That is pretty much what this process looks like.
To start, they create a containment barrier out of plastic around the areas planned for the asbestos and mould remediation and install an air scrubber to control the release of any fibres. All personnel removing the material must wear hazmat suits with respirators. Once inside, they can remove the drywall and insulation and bag it in special bags for disposal. They then do a HEPA vacuuming and wet wash to clean up any fibres that may have been released. Finally, they perform an encapsulation process to ensure any fibres or other hazardous materials remaining cannot become air bound. Upon leaving the building they go through decontamination chambers, built on site, to ensure their safety.
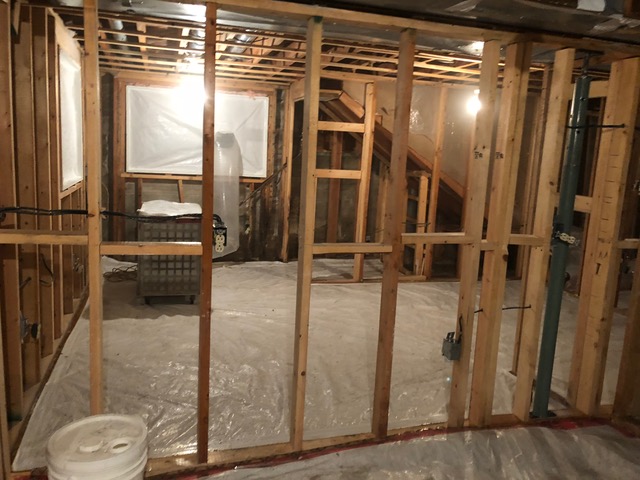
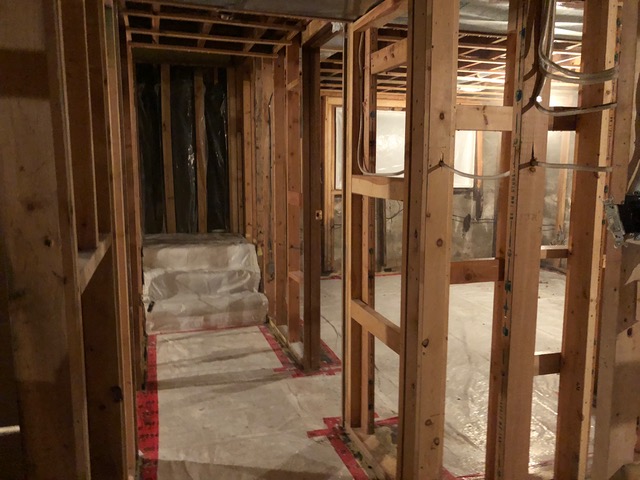
We were quite shocked by how much is involved, but I have to say not as shocked as we were by the price of the work. I am not sure there is a bottom to this rabbit hole. My husband and I deliberated over this for a while to determine what to do. Do we do it all, or just some? But in the end we decided to stick with the original plan and do all the work, as it is the right thing to do and we did not want to encounter the need to do more later. This process took about 5 days to complete.
Remediation Findings
Sadly, cost is not the worst part of this story, as the horror is still to be discovered. Once the team finishes the asbestos and mould remediation we receive a call saying they are done and we can again enter the house. However there were two main issues found: rot and a chimney in the middle of the kitchen. What?
The next day we ventured to the house to assess the outcome. As we looked around a feeling of nausea overwhelmed me. This is where the horror story begins. All we can say is it is amazing the previous owner did not burn his house down or float away from water issues!
Mould issues
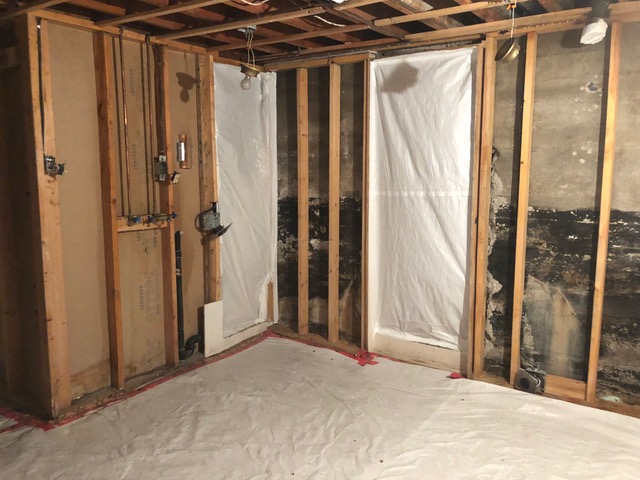
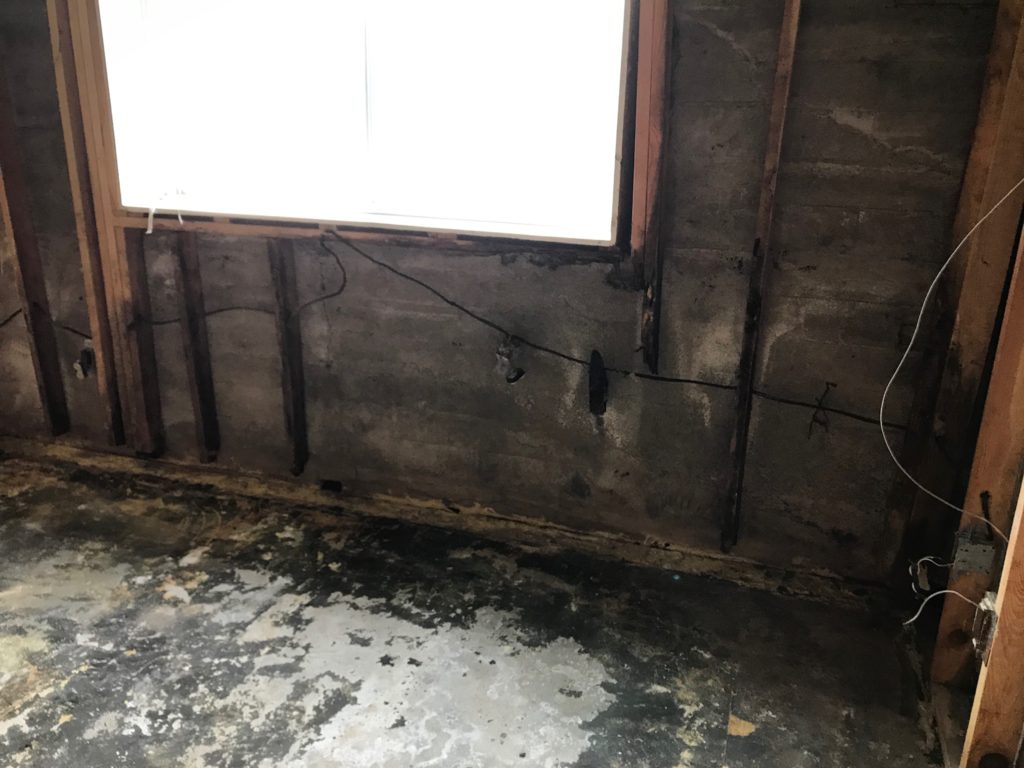
First let’s start in the basement. The basement is unrecognizable with all the walls and ceilings ripped down to the studs. Our first stop is to look at the foundation walls. Was there a fire down here at one time? No… it is mould that has rotted away the studs. Yes I said rotted away! The moisture down here was so bad that it rotted the stud wall to the point that the bottom portions of the studs and the bottom plates had completely disintegrated. Leaving behind only mouldy pieces of studs looking charred as though they had been burnt.
If you recall in my post Demolition Day – The Acorn Mystery, we had discovered a saw dust like material along the foundation walls. Originally my concern was potential carpenter ants? Well fortunately no ants, but unfortunately the damage was almost as bad, considering the studs are no longer in place! In addition there was wiring that had been sitting in this moisture for who knows how long, where the sheathing was also starting to disintegrate.
Here is our first moment of thinking, lucky they didn’t burn the house down. But wait there is much more to come. How can someone not have noticed this type of ongoing moisture issue? This must have been going on for decades.
You know it is bad when your asbestos and mould remediation specialist and realtor both say they have never seen anything like it in their entire careers. Well lucky us, that we get to experience this once in a lifetime moment! And this is where the legal battle is introduced. More to come on that exhilarating journey!


Foundation Issues
As we recover from the shock of this, we take a closer look at the foundation. Unfortunately we discover more cracks than originally thought. But the best… the window installs. They cut holes in the concrete for windows, but left big chips in the concrete around the windows without filling them. In some cases they filled in spots with 2X4s without any sealing. The only cover… a scratch coat on the exterior of the house that has since cracked and you can see through the foundation from the inside. In addition to this, there are two previous windows that are only boarded up with no concrete or filling.
But even with these issues, you may still ask why that much moisture? Well on top of it all, the owner had gardens around the perimeter of the house with automatic sprinklers aimed right at the foundation. So basically they had been watering their basement for decades. No wonder there are water issues! As disturbing as this is, thankfully we did this work and can at least address the issues.


Creosote Issues
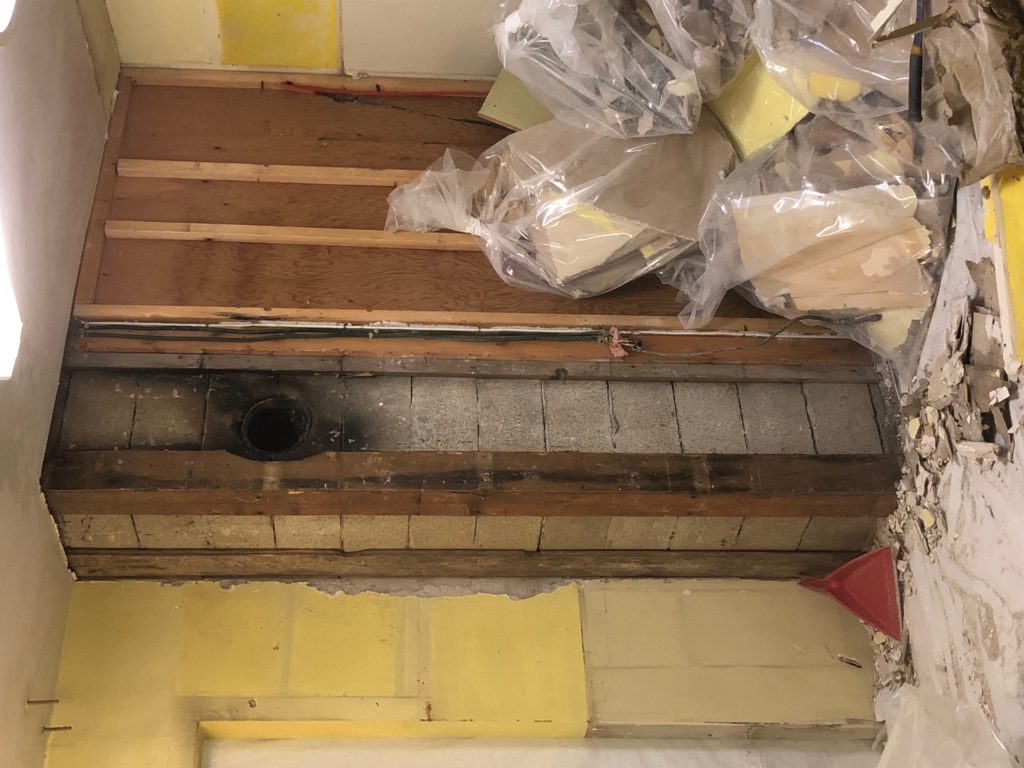
Let’s move upstairs where we have removed the drywall between the kitchen and dining room with the hope to open the kitchen up. We also removed a closet that juts into the kitchen with hopes to open the other side of the kitchen to add more space. As you may recall from Kitchen Design – to Open or Not to Open That is the Question, the closet removal went well with the exception of the discovery of a cinderblock chimney located right beside the closet in the middle of the wall of the kitchen. Sadly this prevents opening up the kitchen on that side, without significant work to remove the chimney. A very sad moment from a design perspective.
But back to the horror story. It appears this chimney was once used for a wood stove in the kitchen. This is also where the previous owner vented his wood burning heater downstairs. The chimney opening in the kitchen was never capped and has been venting into the kitchen walls and ceiling for years. Scary for the health of the home owners. In addition to this, we find a bare wire that is hidden behind the drywall on the chimney. After testing it we found out it was also live. Second moment of not believing the house had not burned down! So scary.


Structural Issues
Here is a reminder of what other mishaps we encountered in the kitchen. When we turn to the other wall where the drywall has been removed, we find a poorly supported header. The entry from the kitchen to the dining room is supported only by one small corner of a 2X4 on one side. Amazing this house is still standing. Very quickly, we install a temporary support. What will it take to repair this? Can the exiting header still be used? Will we need to replace it? Open up more walls? Too many questions to consider at this time, as we are not done with this story yet.

Wiring Issues
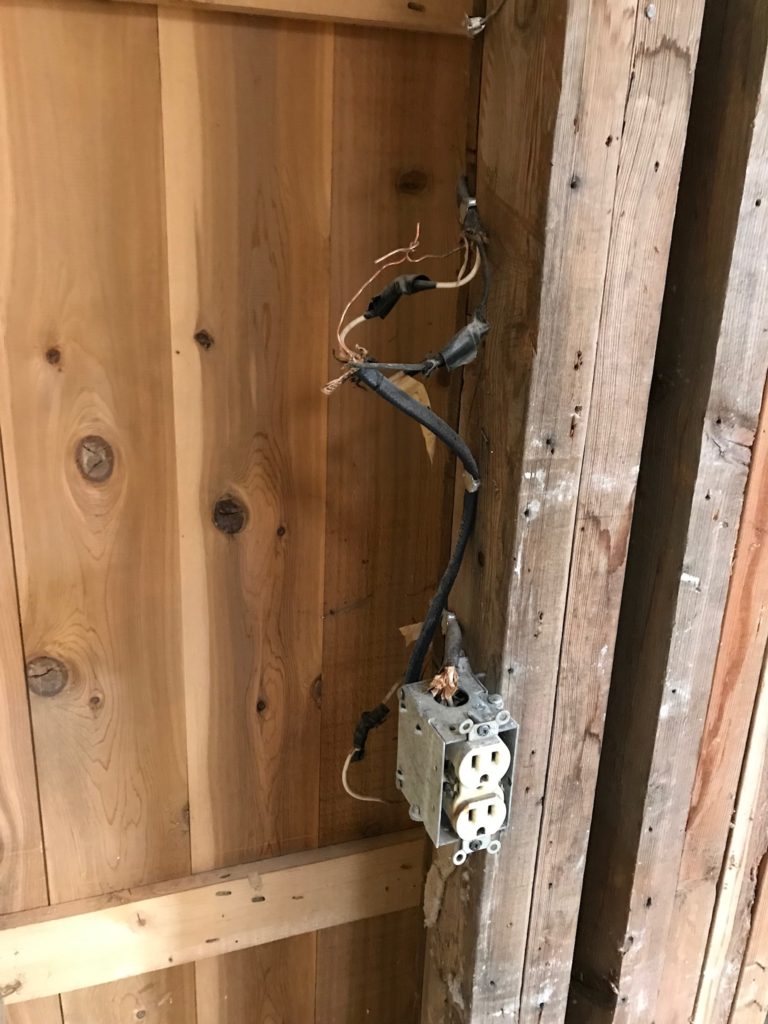
Next we look at the wall between the kitchen and dining room. Where we find a spider web of wires. Who knew the spider theme would continue in such a hazardous way! Like a nest of black widow spiders laying in wait. There are bare wires, ripped sheathing, crisscrossing bare wires and unprotected connections… and all live. A fire waiting to happen. We immediately turn off the power. Again, amazing the house has not burned down.
Shiplap Discovery
There is at least one fun find during this process. Remember how I told you there was an addition put on in the 70’s against the kitchen? Well it appears this wall was the front door of the original house. When doing the addition they left the exterior wall completely in tact with a doorway, window opening, and siding. Then they built another studded wall on the other side of it. So the positive side… is getting to see the old bones of the house. It’s a bit like the house baring its soul to us. Maybe we should incorporate these into the kitchen design, a door and window for food delivery?
Another exciting discovery… the original siding of the house is still in place and it is all shiplap! I have to say this made my day and was the only really happy news of the day. Any of you who watch home reno shows will know that shiplap is the big thing that people are using on walls inside houses to give that farmhouse look. I had wanted to put some in the house, but instead of buying it we can use original material from the house and maintain its character. Ah the ideas are flowing. Unfortunately I think my husband is seeing more work than the fun factor that I am seeing.


Remediation Next Steps
So now we are adding stud repair, header support, additional foundation repair and wiring updates to the reno list. All important and necessary things, but the list and bills keep growing and we haven’t even started on the renovations that actually change the look of the house. Now give me moment as I have a bit of a break down! I think the house is crying with me.
Well I don’t know about you, but this day has been an emotional one, one that has made me angry, sad and happy, and has left us both scared and exhausted all at the same time. But, I think we have finally reached the bottom of the rabbit hole – with a very big thud! I am scared to open my eyes as I think we have landed in front of the Queen of Hearts for our judgement day. Maybe someone will wake me from this nightmare and we will find out that it is all just a dream. I hope I have not discouraged you and you will continue to follow along, as I have to believe the happy ending is still around the corner.
2 thoughts on “Remediation – down the rabbit hole”
Joanna Gains would be in her glory if she could get her hands on the ship lap in this house. The house just keeps on giving up new surprises. I think by the end of this endeavour that you and your husband will have come across just about everything in a renovation that is possible. Keep at it. You can already see and feel the transformation.
TGFS….Thank God for Shiplap! After all the surprises and comments with bad news it is refreshing to hear that your house was built with good old « shiplap ». Those thick overlapping boards make for some really strong structures like floors, walls and roofs. You are slowly but surely headed towards a renewed home with better features. Good luck.
Comments are closed.